# Installing FileMage Gateway on IBM Cloud
FileMage Gateway is available on IBM Cloud as a virtual machine image. This image is fully functional upon launch and requires no additional configuration to use. However, you may need to make certain changes depending on your specific use case.
Note
When deploying a Linux image, SFTP is running on port 2222.
# Deploying a Virtual Machine
To deploy FileMage in IBM Cloud, go to the FileMage Gateway catalog entry in the IBM Cloud Marketplace (opens new window).
Mark the checkbox for third-party terms and click Continue.
Under Details:
- Select the location of the virtual machine.
- Enter a name for the virtual machine.
Select a SSH key for the instance.
Select a VPC network for the instance.
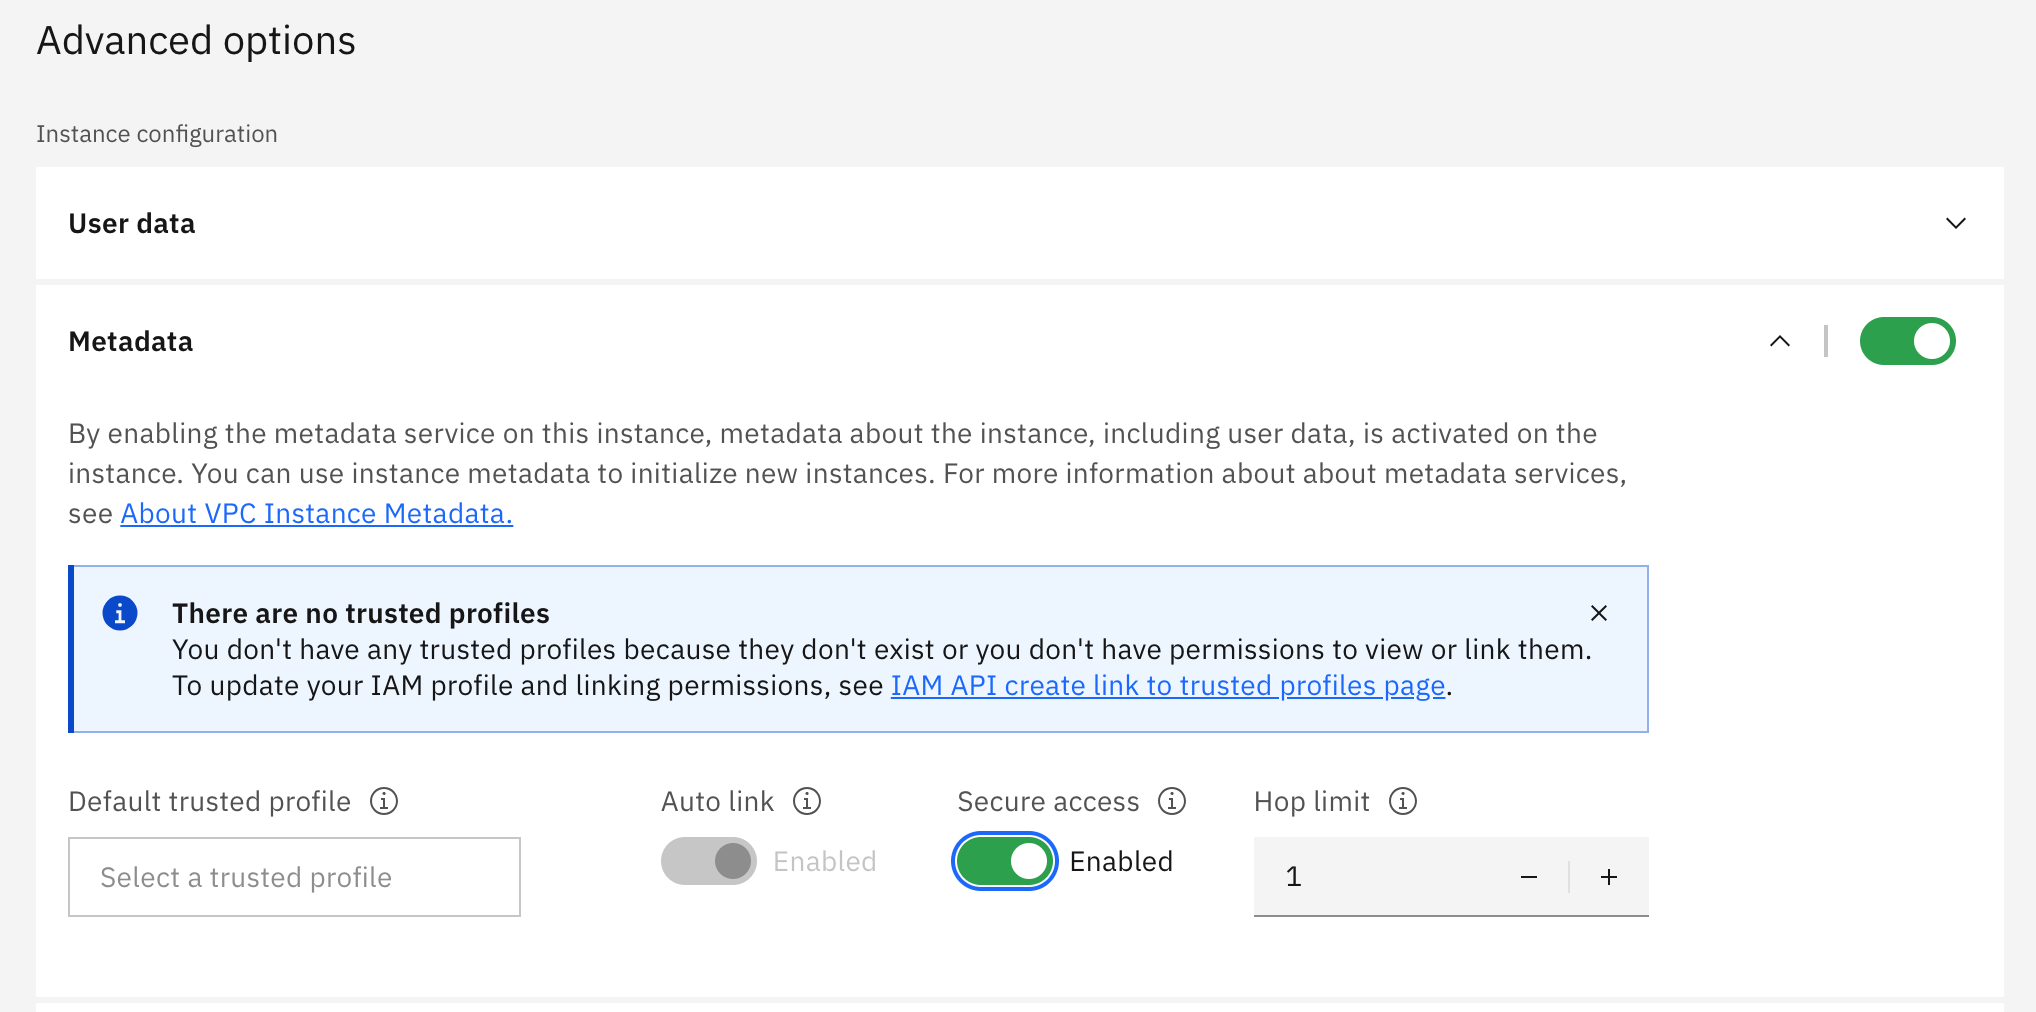
Under Advanced options:
- Enable the slider for Metadata.
- Expand the Metadata section and enable Secure access.

Note
Secure Metadata must be enabled for the application to function. If the instance is started without this enabled then you may enable it on the running instance, and then restart the application service.
- Click Create virtual server.
# IBM Cloud IAM Permissions
FileMage Gateway requires the following IAM roles to function:
- Content Reader
- Content Writer
- Object Writer
If you wish to configure a custom role with more granular permissions the actions in the table below are required.
| Action | Description |
|---|---|
| cloud-object-storage.bucket.get | List all the objects in a bucket. |
| cloud-object-storage.bucket.head | View bucket metadata. |
| cloud-object-storage.bucket.get_location | View the location and storage class of a bucket. |
| cloud-object-storage.object.get | View and download objects. |
| cloud-object-storage.object.head | Read an object's metadata. |
| cloud-object-storage.object.put | Write and upload objects. |
| cloud-object-storage.object.post_initiate_upload | Initiate multipart uploads. |
| cloud-object-storage.object.put_part | Upload an object part. |
| cloud-object-storage.object.copy_part | Copy (write) an object part. |
| cloud-object-storage.object.copy_part_get | Copy (read) an object part. |
| cloud-object-storage.object.post_complete_upload | Complete a multipart upload. |
| cloud-object-storage.object.copy | Copy (write) an object from one bucket to another. |
| cloud-object-storage.object.copy_get | Copy (read) an object from one bucket to another. |
| cloud-object-storage.object.delete | Delete an object. |
| cloud-object-storage.object.get_uploads | List parts of a multi-part object upload. |
| cloud-object-storage.object.delete_upload | Abort a multipart upload. |
| cloud-object-storage.object.post_multi_delete | Delete multiple objects. |